Safety Zones are an important feature of LaserOS. They allow you to designate zones within the projection area where the laser will not project.
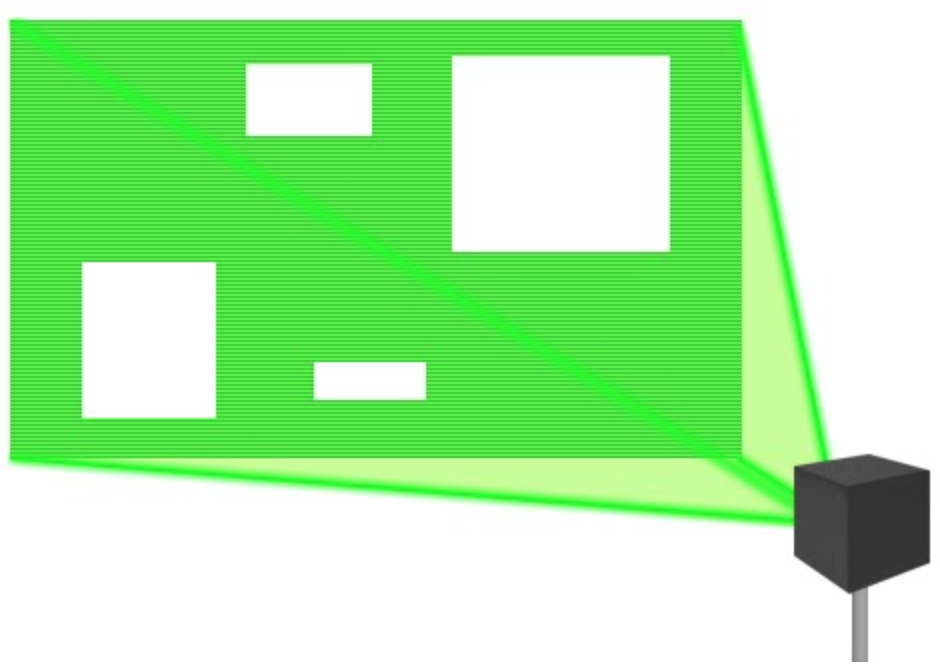
Safety zones are “blank” areas in the projection where the laser projector will not scan. This is useful to protect sensitive equipment such as cameras, avoid reflections or other dangerous situations, and as an extra safety feature of LaserOS.
To set up safety zones, go into the safety zones settings menu and toggle the “Attenuation Zones” switch to “ON”.
Set the preview switch to “ON” to see a projection of the attenuation zones. You will also see them in the preview window of the control panel.

Attenuation is the amount the laser is blocked from scanning in the safety zone. An attenuation of 0 means full power scanning, and an attenuation of 100 means scanning is completely off inside the safety zones. Use the attenuation slider to control the level of attenuation.
Use the X and Y sliders to position the attenuation zone. Use the width and height sliders to set the size and shape of the attenuation zone.
To add more attenuation zones, click the “add” button. This will duplicate the attenuation zone you already have set, so you’ll need to adjust the position or scale in order to see the new attenuation zone.
Clicking the “CLEAR” button will remove all of your user-defined attenuation zones, and display the default, single, square attenuation zone.
When you are finished setting up your safety zones, toggle the preview switch to “OFF”. Now, laser projections will be blocked from scanning in the safety zones.